1. Fix the base size and freeze it
Pick one size and commit. Every measurement, every grade rule and every artwork placement is expressed relative to it, so changing it later invalidates all three. Most brands use M for men's tops and S or M for women's. Write it on the cover sheet.
2. Draw the flat to scale, front and back
At a stated scale, not "roughly". Callouts point at places on this drawing, and a drawing at no fixed scale means a callout can't be checked. If you're working from a 3D model the flat comes out of the pattern, which removes this step and the class of error that lives in it.
3. Measure the finished garment, not the body
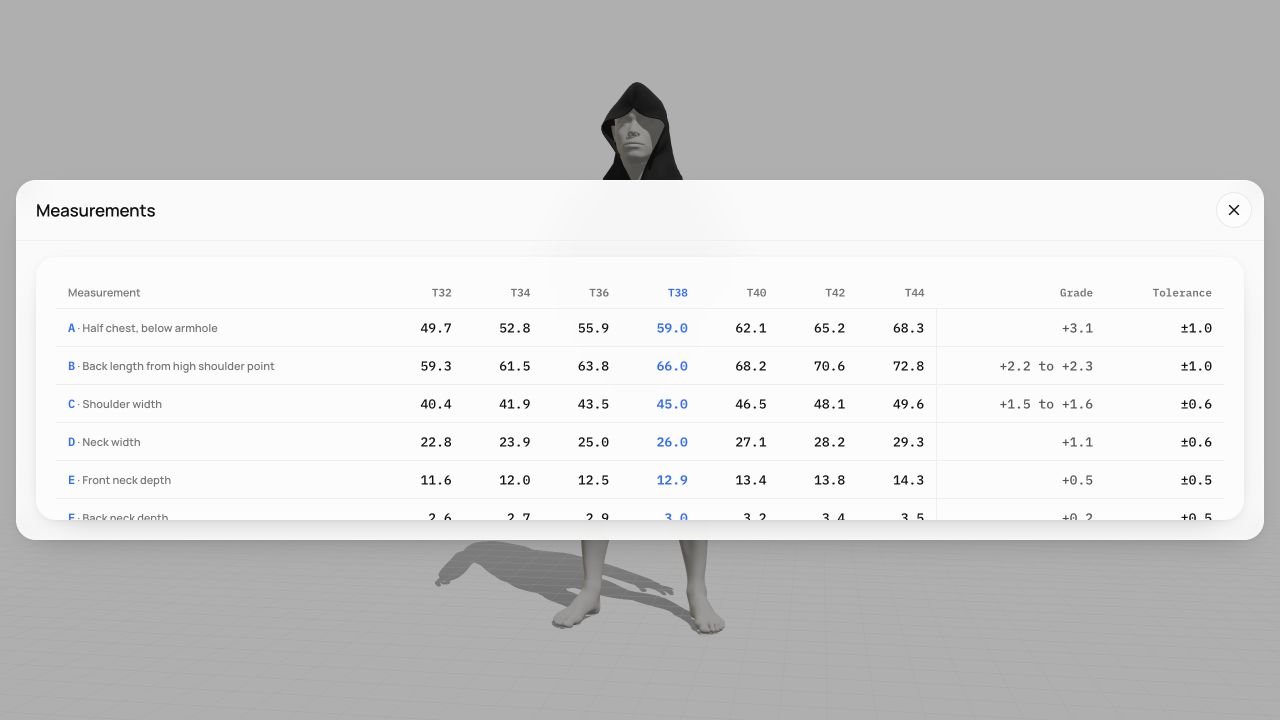
If you have a sample or a garment you like, measure that. Lay it flat, unstretched, and record each point of measure with its instruction — where the tape starts, whether the value is doubled, what the garment is resting on. The full point-by-point walkthrough.
If you don't have a physical reference, the numbers have to come from a pattern. Inventing them and letting the sample tell you how wrong you were is a legitimate strategy, but budget for the sample.
4. Write a tolerance on every point of measure
Before you grade, not after. A tolerance is a manufacturing decision: it tells the factory how much variation gets accepted, and it protects both of you. ±1 cm on a chest, ±0.5 cm on a neck, ±1.5 cm on a body length are ordinary. A blank tolerance column means the factory picks, and their pick will be wider than yours.
5. Assign every edge: seam, finish, or fold
Walk the perimeter of every panel. Each edge is joined to another edge, given a finish, or folded on itself. There is no fourth option, and an edge with none of the three is the most common hole in a first tech pack — silent, because nothing complains about it until a sewer decides.
This is also where you name machines. Overlock, lockstitch, cover stitch, twin needle, bar tack. Allowance widths follow from the machine, not from a house preference.
6. List the bill of materials with suppliers
Every component, including the ones that feel too obvious: main fabric, neck rib, thread, labels, and each trim with a supplier and a reference. Composition and weight in g/m² on every fabric row — weight alone doesn't describe a fabric, but a fabric row without weight describes nothing.
7. Place the artwork from a seam, at print size
Technique first: it decides which file the printer needs and what the minimum line width is. Then placement measured from a named seam, never from the hem. Hems move when the length changes; seams don't. And state the ink count, because going from one screen to three triples the setup and the registration risk.
8. Grade the pattern with a rule per measure
Only now, once the base is frozen and the tolerances exist. One rule per point of measure — chests grow faster than necks, sleeve lengths grow slower than body lengths. The rules, and where a grade goes wrong.
9. Version it, then send the DXF alongside
A version number on the cover sheet and in the filename. The most expensive tech pack error isn't a wrong number, it's two versions of the right number in circulation, and the factory having the older email.
Then send the pattern with it. A PDF alone puts the patterning back on the factory, and whoever drafts the pattern tends to own it.
The step people skip: number four. Tolerances feel like a detail you can add later, and they're the reason a sample gets accepted or rejected. Adding them after grading means revisiting every row.
How long this takes
A first jersey top, worked through honestly with a garment in front of you: half a day for steps one to seven, and a day or two of waiting on quotes for the BOM references. Grading is an hour if you have a rule set and a week if you're deriving one.
The second style is much faster, because steps four, five and six are largely copy-forward — which is exactly the argument for keeping them somewhere reusable rather than in a file per style.
Start from the blank template, or read what a tech pack is for first.